Online PurchaseVideo EncoderSoftwareInstallation Guide
Project: Device User Guide | page_id: 1085
[TOC]
1、Prepare the Installation Package
Prepare the installation package
If you have not downloaded it, you can click to download
2、Installation on Linux
Description
Linux 64-bit system
CentOS6.5 and above are OK, Ubuntu, etc.
2.1、Upload the Installation Package
Transfer the downloaded installation package to the Linux server. You can use tools such as xshell together with xftp to upload it. After logging in via ssh, click xftp and upload the package.
2.2、Extract the Installation Package
After uploading to the Linux system, execute the following commands. If you are not the root user, add sudo to execute
sudo apt-get install bzip2
tar -jxf rootfs.tar.bz -C /tmp
sudo cp /tmp/rootfs/* /  -rf
- Important Note
init_record.sh may format your /dev/sdb disk. If you do not want this to happen, please execute the following command to delete this script
sudo rm /usr/ext/init_record.sh
2.3 Start the Service
cd /usr/samples
./autorun.sh
2.4 Stop the Service
./stop.sh
3. System Activation
3.1 Backend Management Login
Suppose your server IP is: 192.168.0.10
Use the Google Chrome browser to visit: http://192.168.0.10
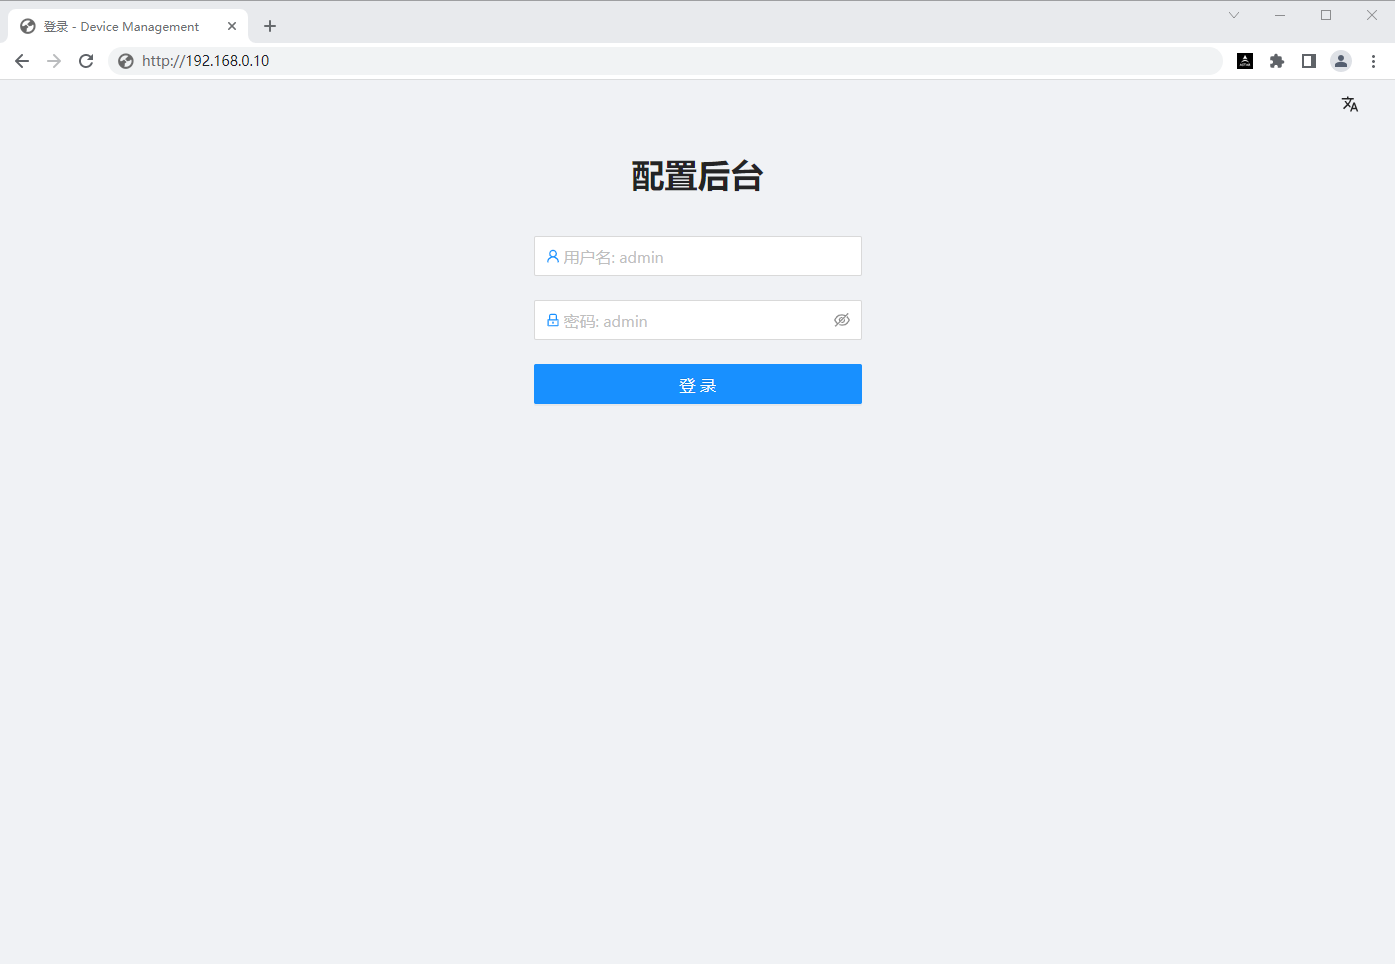
Default user name: admin
Default password: admin
Click Login
3.2 Get the Machine Code

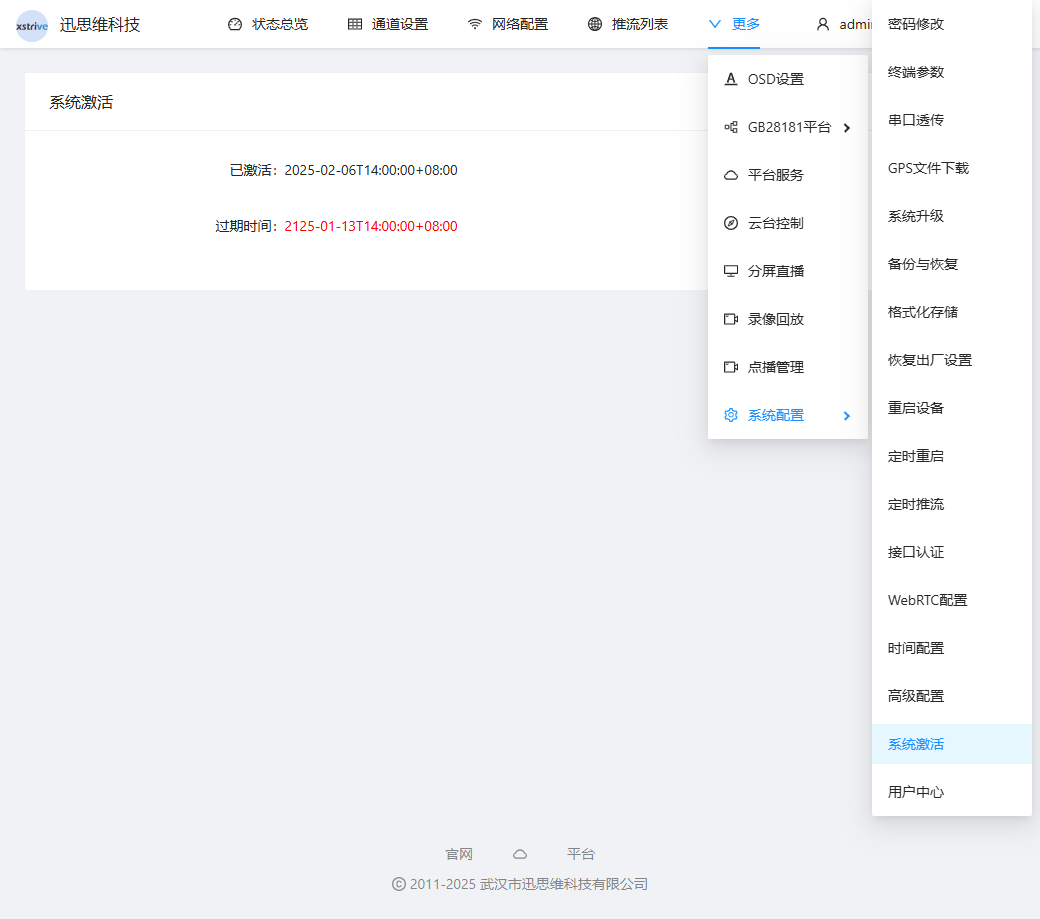
Under the [System Activation] menu, click "View Machine Code" to pop up the machine code display page, and copy the machine code.
3.3 Purchase an Activation Code
3.4 Activate the Software
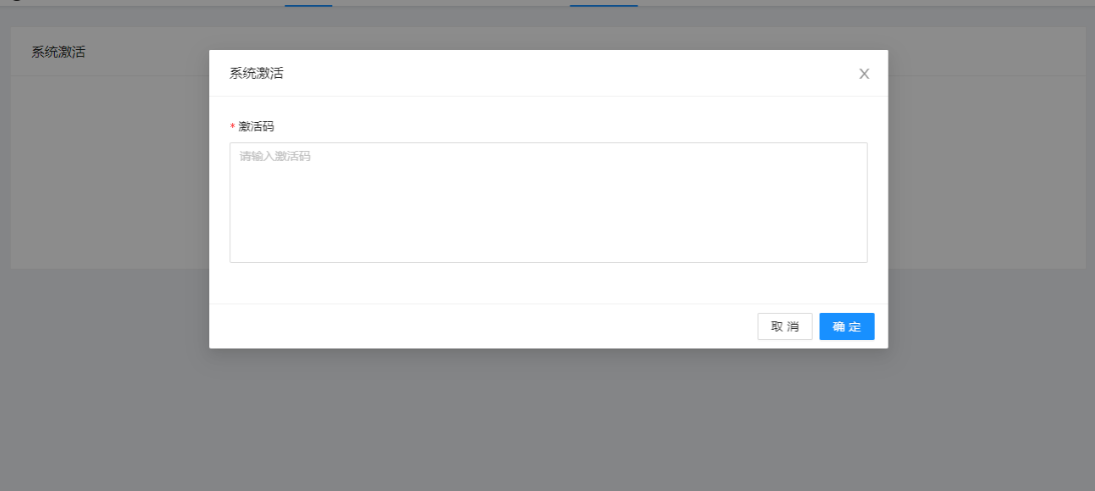
After the payment is completed, the activation code will be replied to you by email. Copy the activation code in the email, click [System Activation] under the [System Activation] menu, paste the activation code you just copied into the pop-up box, and click [OK] to activate the software.
4. Add Auto-Run on Boot (Optional)
4.1 Edit /lib/systemd/system/rc-local.service
sudo vi /lib/systemd/system/rc-local.service
Add the following content
    [Install]
    WantedBy=multi-user.target
    Alias=rc-local.service
4.2 Edit /etc/rc.local
sudo vi /etc/rc.local
Add the following content
#!/bin/bash -e
sh /usr/samples/autorun.sh
4.3 Add Execution Permission and Run on Boot
sudo chmod +x /etc/rc.local
sudo systemctl enable rc-local
5. Ports Used
5.1 Default Configuration
Default WEB port: 80 (TCP)
Default RTMP port: 1935 (TCP)
Default RTSP port: 554 (TCP)
Default GB28181 port: 5060 (UDP/TCP) 58200 (UDP) 58300 (TCP)
5.2 Description
The above ports need to be opened for other network access
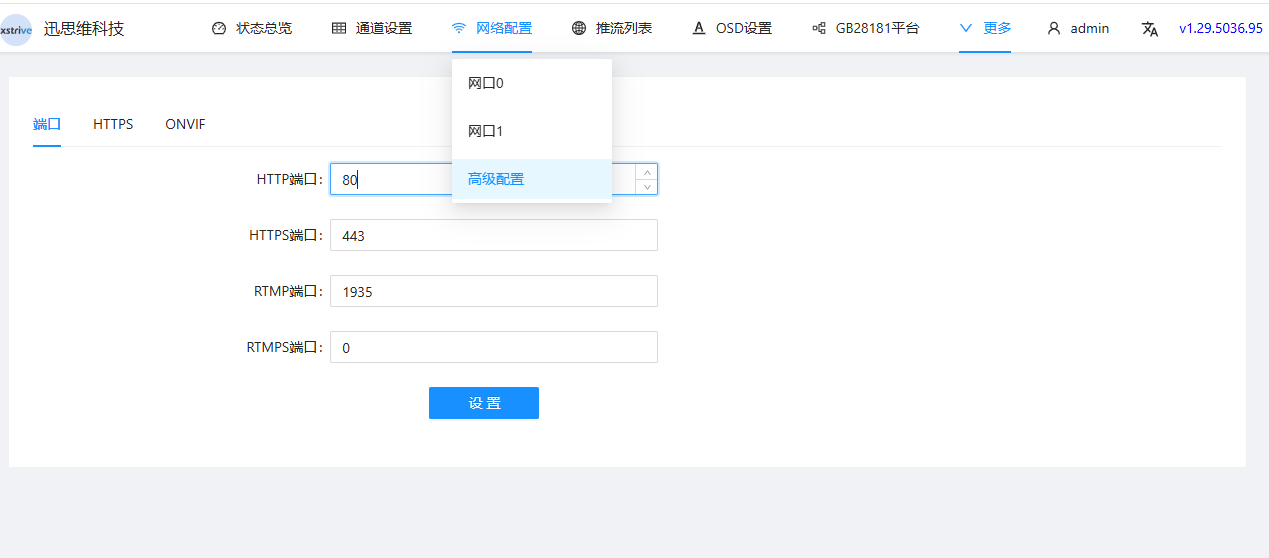
The ports can be configured and modified in /usr/samples/liveConf.toml as needed, or modified in [Backend Management Interface] [Network Configuration] [Advanced Configuration]
6. Server Hardware Configuration
| Stream Pushing Concurrency | Recommended Configuration | Theoretical Bandwidth Requirement (1Mbps) | Theoretical 7-Day Storage (1Mbps) |
|---|---|---|---|
| 40 concurrent | 4 cores 8G memory | 40M | 2.88T |
| 100 concurrent | 8 cores 16G memory | 100M | 7.21T |
| 200 concurrent | 16 cores 32G memory | 200M | 14.42T |
| 600 concurrent | 32 cores 64G memory | 600M | 43.27T |
The above configuration is calculated based on RTMP stream pushing at 1Mbps. When the bitrate is higher, it is recommended to appropriately upgrade the server configuration
Theoretical calculation formula for 1 channel at 1Mbps bandwidth stored for 1 day:
1Mbps/8MBps3600 seconds24 hours1 day1 channel/1024GB = 10.55GB
Theoretical calculation formula for 40 channels at 1Mbps bandwidth stored for 7 days:
10.55G * 40 channels * 7 days/1024TB = 2.88TB