UVC Live Streaming Device: User Guide & Troubleshooting
Project: Device User Guide | page_id: 976
This manual applies to our UVC live streaming box.
Note: As this is a generic manual, the screenshots shown here may differ from the actual pages of your specific device. Please refer to the actual device pages.
1、 Packing List
Device x1 USB power cable X1 Network cable ×1 64G USB flash drive ×1 (Note: all products are provided with an electronic manual only)
2、First Use
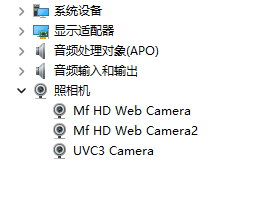
Connect the UVC streamer to the network with a network cable, and connect the USB cable to the computer and the device. Check whether three cameras appear in the Device Manager of the computer (three cameras means three platforms can stream at the same time). If they appear, the connection is successful; if not, the connection failed and you need to unplug and reconnect.
If you need to log in to the device backend:
Use the Device Search Assistant to search for and modify the device IP. Note that the computer and the device must be under the same switch/router. If the device cannot be found, you can check the forced search option in the Device Search Assistant.
Note: !!! If you find that you cannot log in using the IP address 192.168.0.233, it is because the computer and the UVC live streaming box are not on the same network segment. You need to change the IP address of the streaming box. Tutorial: Device Search Assistant. Click to view the tutorial and make the change
3、Login Page
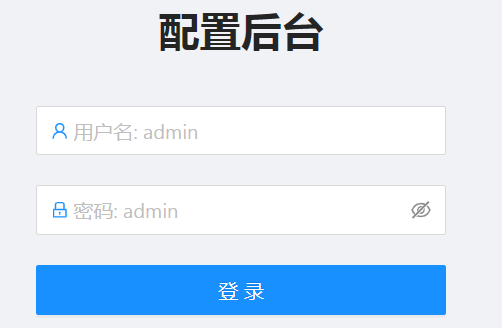
This device is configured through a web management interface, and supports management and configuration from terminals such as PC, tablet and mobile phone. On PC it is recommended to use the Google browser to manage the device.

After changing the device IP using the dedicated Device Search Assistant software mentioned above (see the Device Search Assistant manual for instructions),
enter the device IP address in the Google browser to open the device management login page, as shown in Figure 1 below:
4、Material Preparation - Preparations Before Live Streaming
1、Notes:
①Do not use a video that is too large. If it is too large, please edit it down to 4G or split it into small clips; you can also play them in a loop. Check whether the video resolution is greater than 1080*1920; resolutions above this cannot be recognized. You can use Jianying (CapCut) to export the video, and make sure the video is in mp4 format — other formats are not supported.
②Check whether the USB flash drive is in exfat format; if not, please format it to this format.
2、Selecting Material for Live Streaming on the Streaming Box:
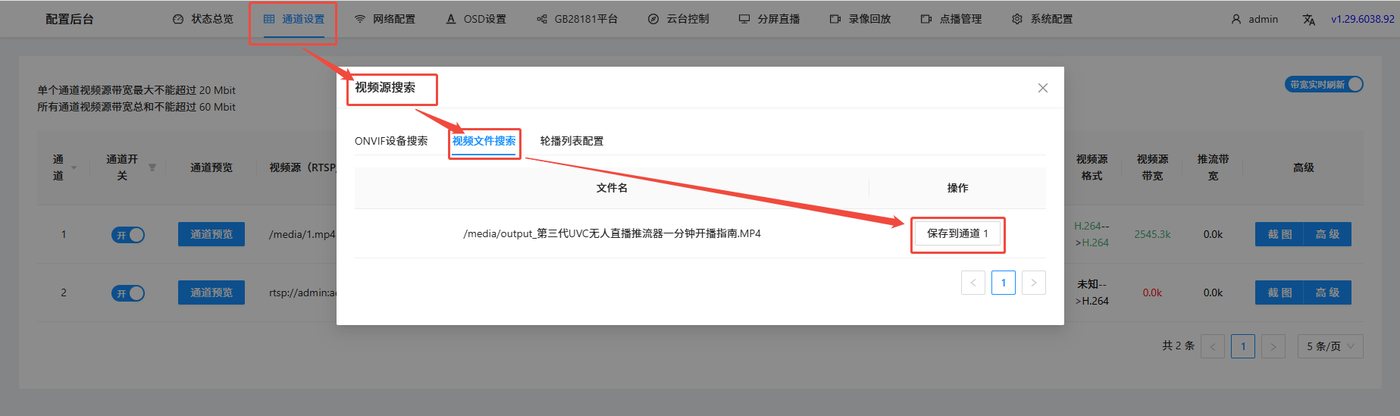
After logging in to the device backend, go to Channel Preview - Search - Select video file:
3、To Set Sequential Loop Playback
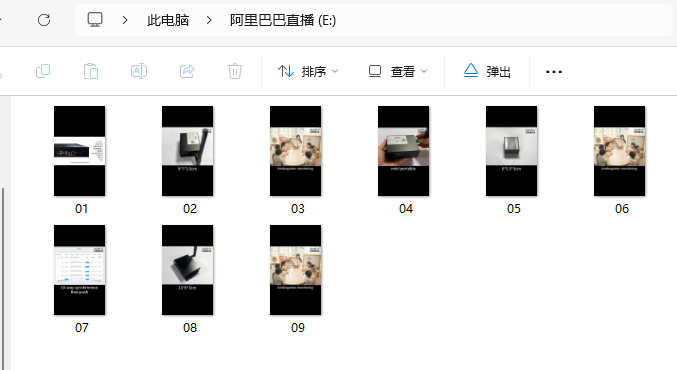
Name the video files to be played with numbers, put the video files into the root directory of the hard disk, insert it into the UVC streamer, enter the device backend (the default account and password are both admin), click "Settings" in the "Channel Settings" column to enable video loop playback, set the loop playback time, select the videos in order, and then click "Save".
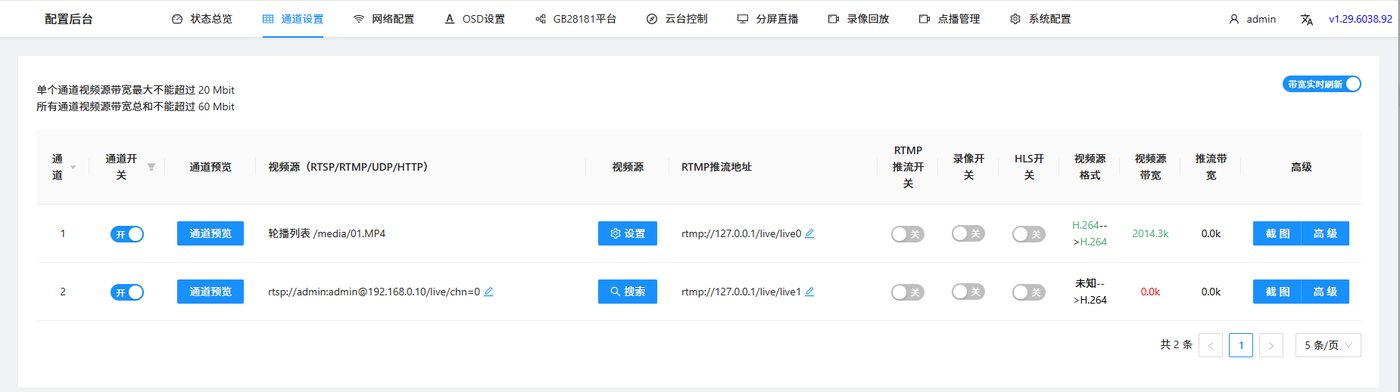
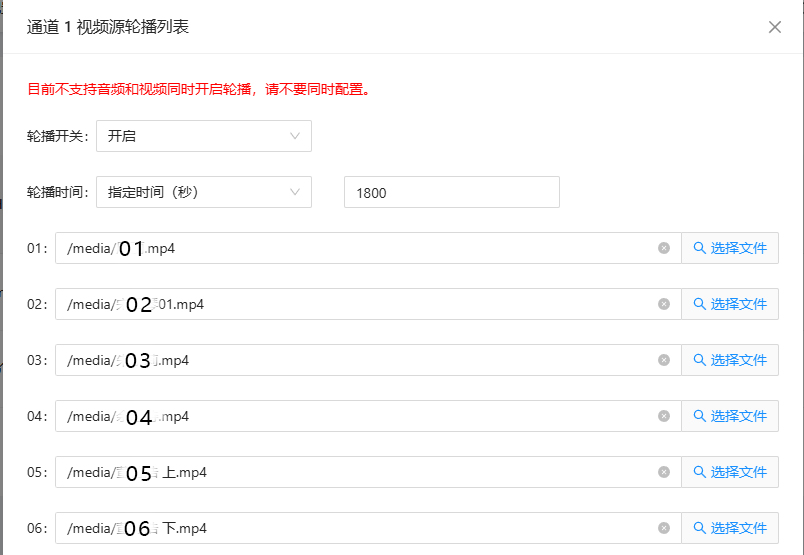
-
To set random video playback, create a folder named "v" in the root directory of the hard disk, put the video files into the "v" folder, and then insert it into the UVC streamer.
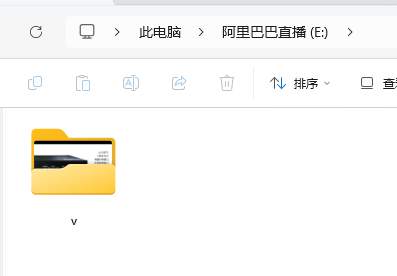
-
Open any live streaming software, click Add Camera, and add any one of the three cameras (if platform A uses camera 1, other platforms must choose the other two cameras, otherwise a camera occupancy conflict will occur).
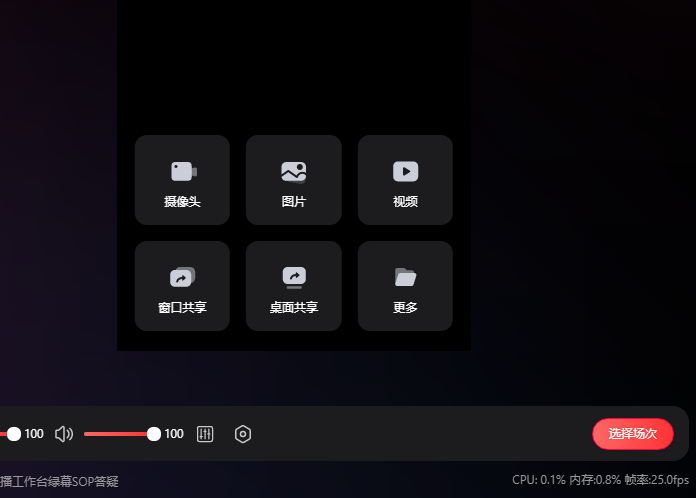
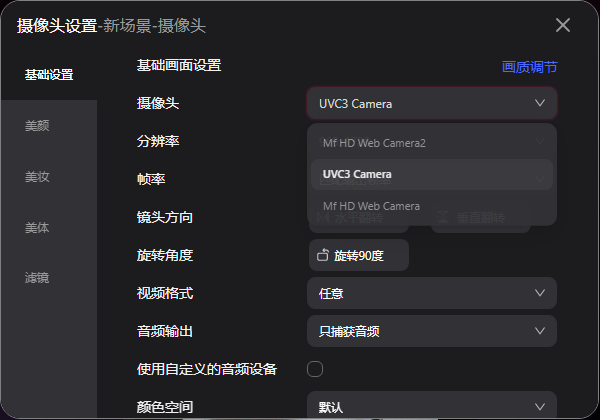
-
After the settings are done, click "Start Streaming" to begin unattended live streaming. The UVC unattended live streaming encoder supports Taobao, Douyin, Kuaishou, Xiaohongshu, Bilibili, Alibaba, WeChat Channels, Douyu, Huya and most other live streaming software on the market.
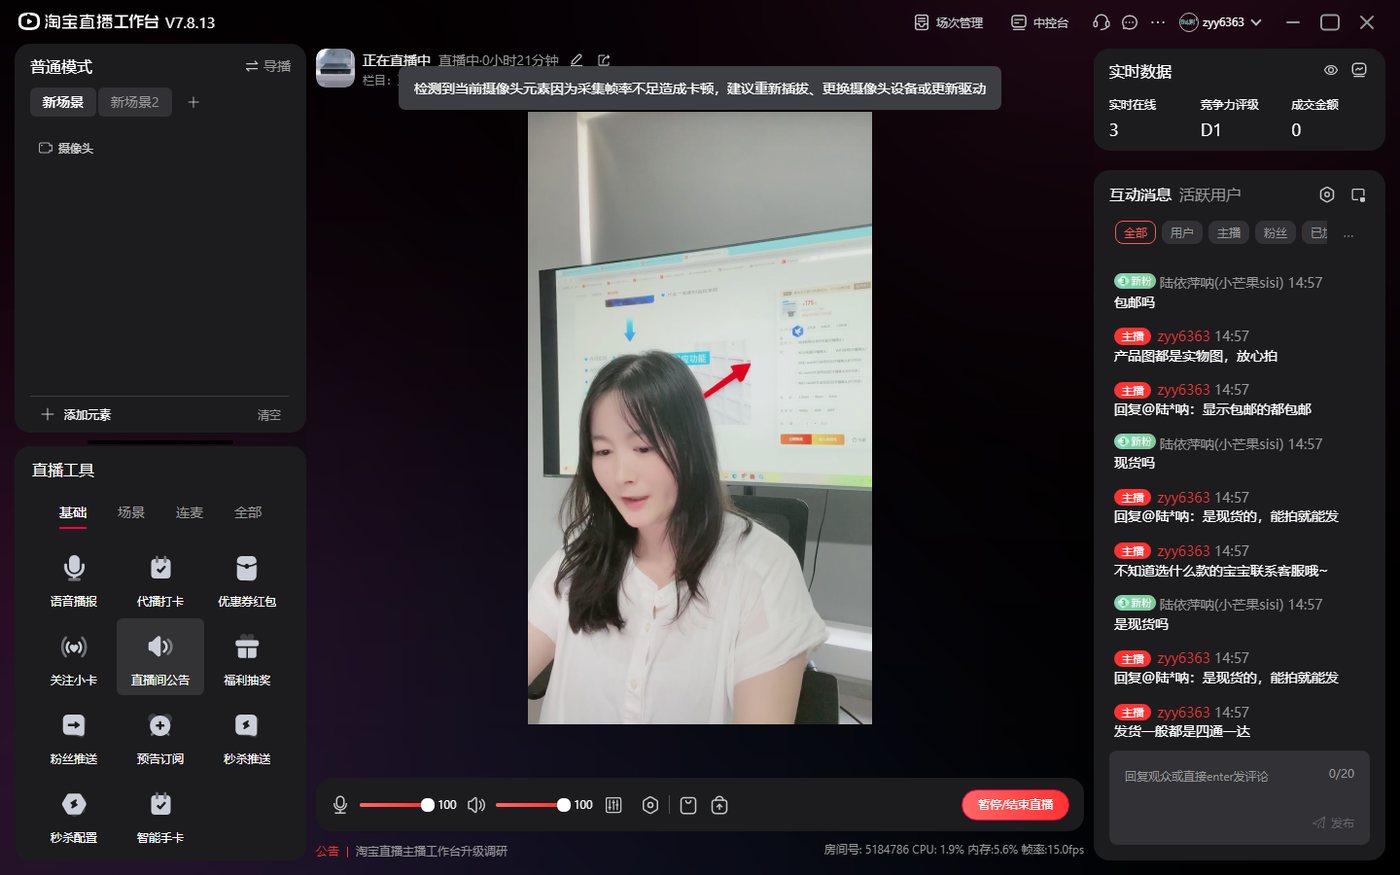
4、How to Set Picture-in-Picture?
①First, connect the UVC live streaming box and the supplied camera under the same switch or router
②Configuration: first determine the network segment of your computer, as follows:
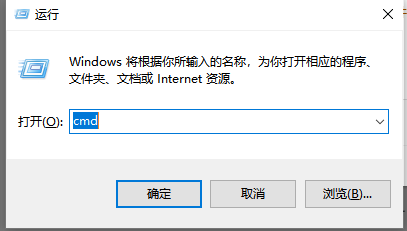
Press Win+R on the keyboard ==> open the system Run window ==> enter cmd to open the command prompt window ==> enter ipconfig to view the current IP address and network segment
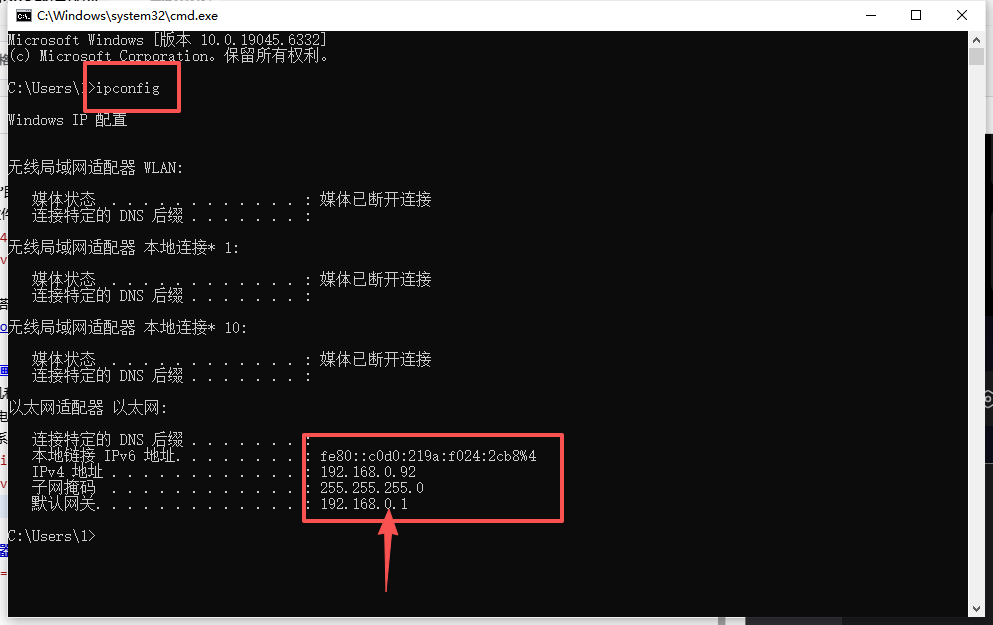
③After determining the network segment, use the search tool to change the IP address of the camera (change it to one in the same network segment)
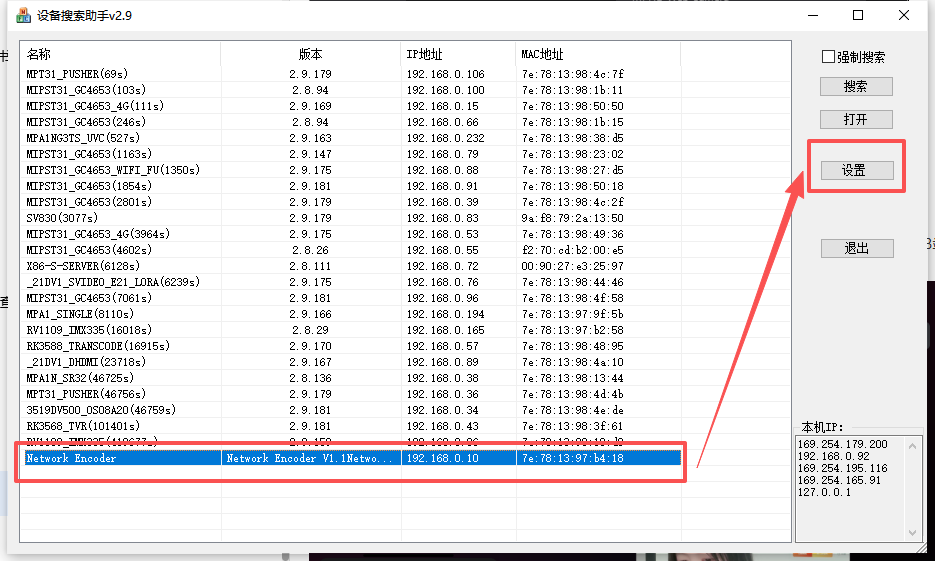
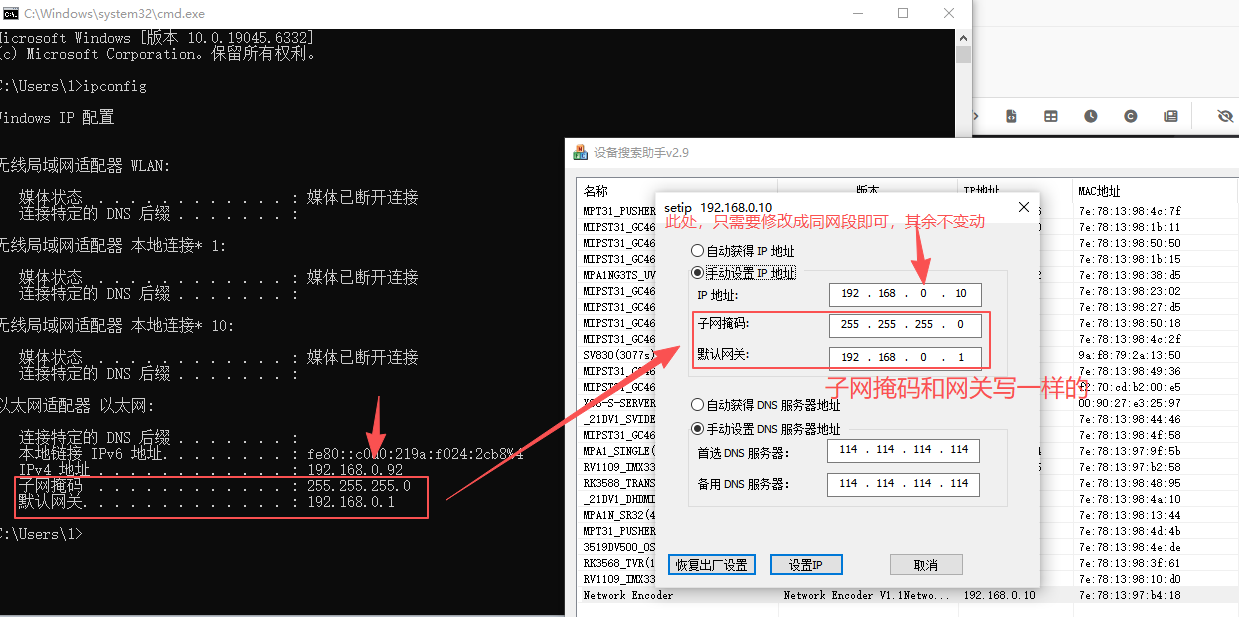
④After the change, log in to the streaming box backend and configure as follows:
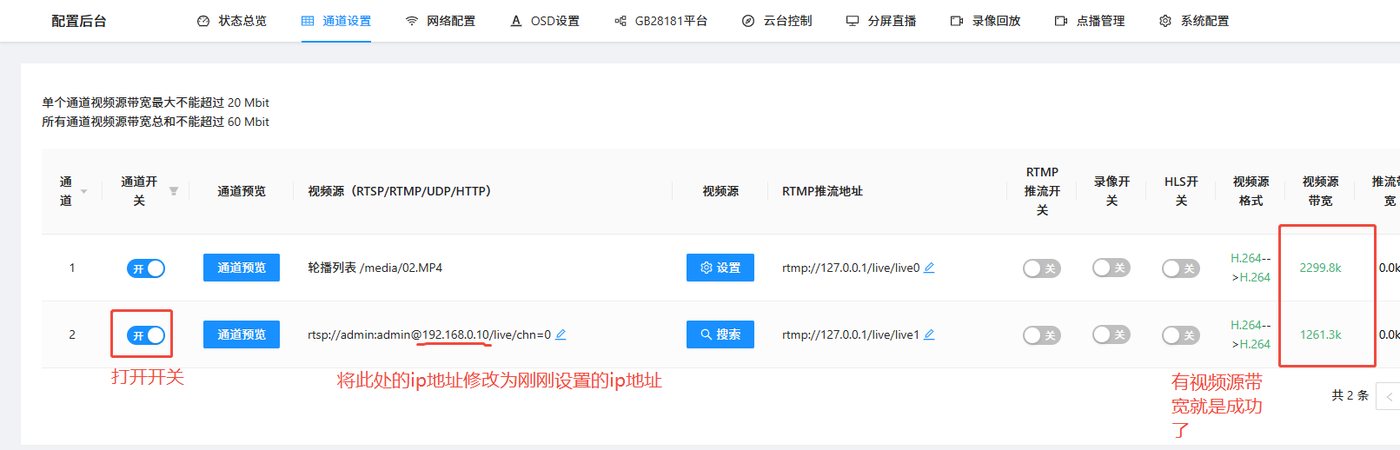
⑤Turn on the switch: there is an audio interface on the device; flip the button toward the external audio interface, then open the live streaming companion app to check whether it takes effect
How to Use the UVC Unattended Live Streaming Encoder
Device FAQ:
1、Cannot start live streaming, no video image
1. If the camera cannot be found when selecting live streaming, try reconnecting the device power switch and reconnecting
2. If the device connection appears normal and the live streaming software can select the camera, but the live image still cannot be displayed, uninstall the camera program in Device Manager, then restart the computer and reconnect. If the device connection appears normal and the live streaming software can select the camera, but the live image still cannot be displayed, uninstall the camera program in Device Manager, then restart the computer and reconnect.
2、No sound in the live image
1. Check the live streaming software: Settings -- Sound -- the microphone must be set to the echo cancellation microphone (XS Mic Camera) (the USB microphone simulated by UVC)
and on the computer open Settings -- Privacy -- Microphone --- Allow apps to access your microphone