DeviceSearch AssistantUser Manual
Project: Device User Guide | page_id: 13
Device Search Assistant
Software download address: DeviceSearchAssistant.zip
-
Connect the device to the switch or router on the current LAN.
Make sure the computer has only one network adapter; if there are other unused adapters, disable them. -
Open the Device Search Assistant software and click Search. As shown in Figure 1, the devices found are displayed in the list box on the left of the Device Search Assistant.
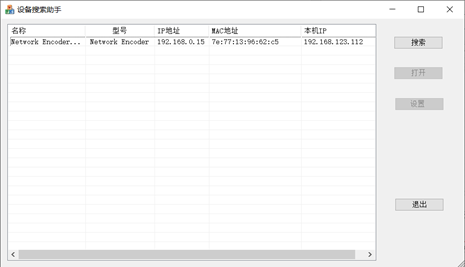
Figure 1 -
Select the device whose IP address you want to change and click the Settings button.
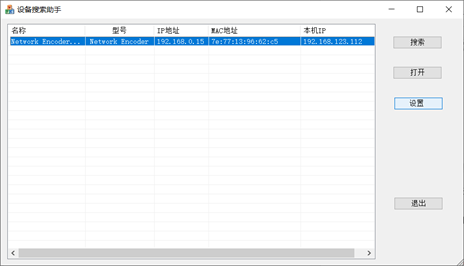
Figure 2 -
In the login dialog that pops up, enter username: admin, password: admin, and click the Login button.
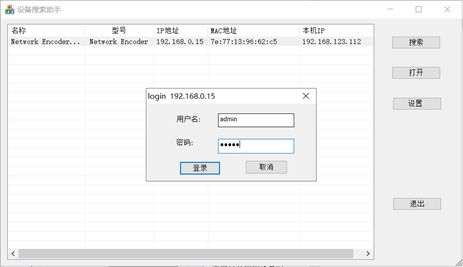
Figure 3 -
Enter the IP address settings page. You can choose to obtain an IP address automatically or set it manually. It is recommended to set it on the same network segment as the current LAN for easier management.
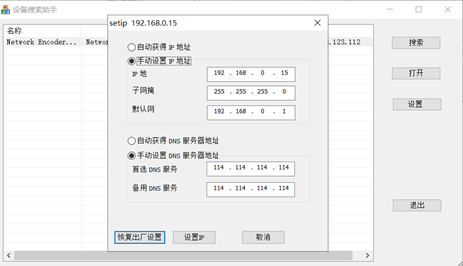
Figure 4 -
After setting the IP address, click "Set IP Address" below to save the settings. The software prompts "IP has been set! Please search again in 30 seconds"; click OK to complete the IP setting.
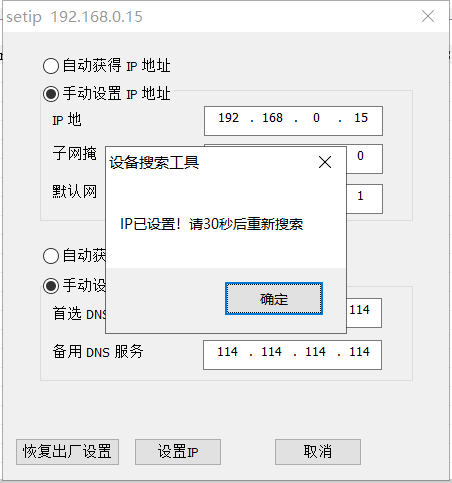
Figure 5 -
After the setting is complete, wait 30 seconds and click the Search button again to confirm that the IP was changed successfully. Once the IP has been changed successfully, open a browser, enter http://modified-IP-address to access the device web management interface. The default username and password of the web management interface are both admin.