SV830D EEasyTech Face Recognition Tutorial
Project: Device User Guide | page_id: 1678
This manual applies to our SV830D Feiyi face recognition device
1. Packing List
Device x1, 12V power cable x1 (Note: all products only provide an electronic version of the manual)
2. First Use
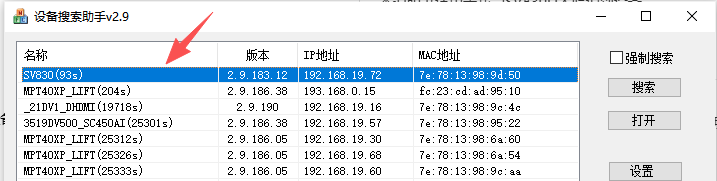
Connect the face recognition device to the power supply and the network cable; there will be a "ding-dong" sound when it is turned on. Use the Device Search Assistant to search for and modify the device IP. Note that the computer and the device must be under the same switch/router. If the device cannot be found, you can check the forced search option on the Device Search Assistant.
Device Search Assistant download address: http://www.xstrive.com/download/
The search results are as follows:
3. Login Interface
This device uses a web management interface for configuration, and supports management and setting of the device from PCs, tablets, mobile phones and other terminals. On the PC side, it is recommended to use the Google browser to manage the device.
After changing the device IP using the dedicated Device Search Assistant software of our company (see the Device Search Assistant manual for the modification instructions)
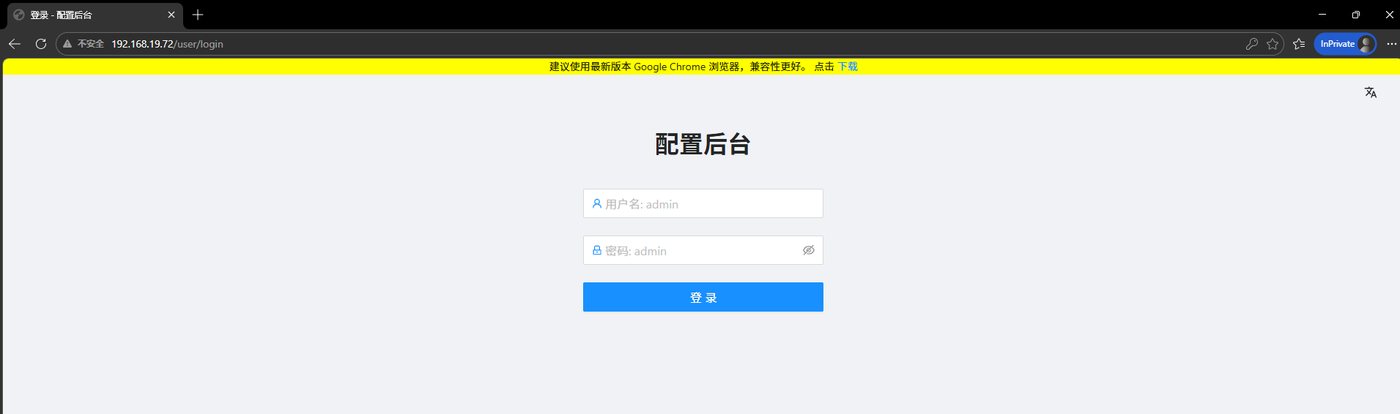
Enter the device IP address in the Google browser to enter the device management login interface, as shown in Figure 1 below:
The default account and password are: admin/admin
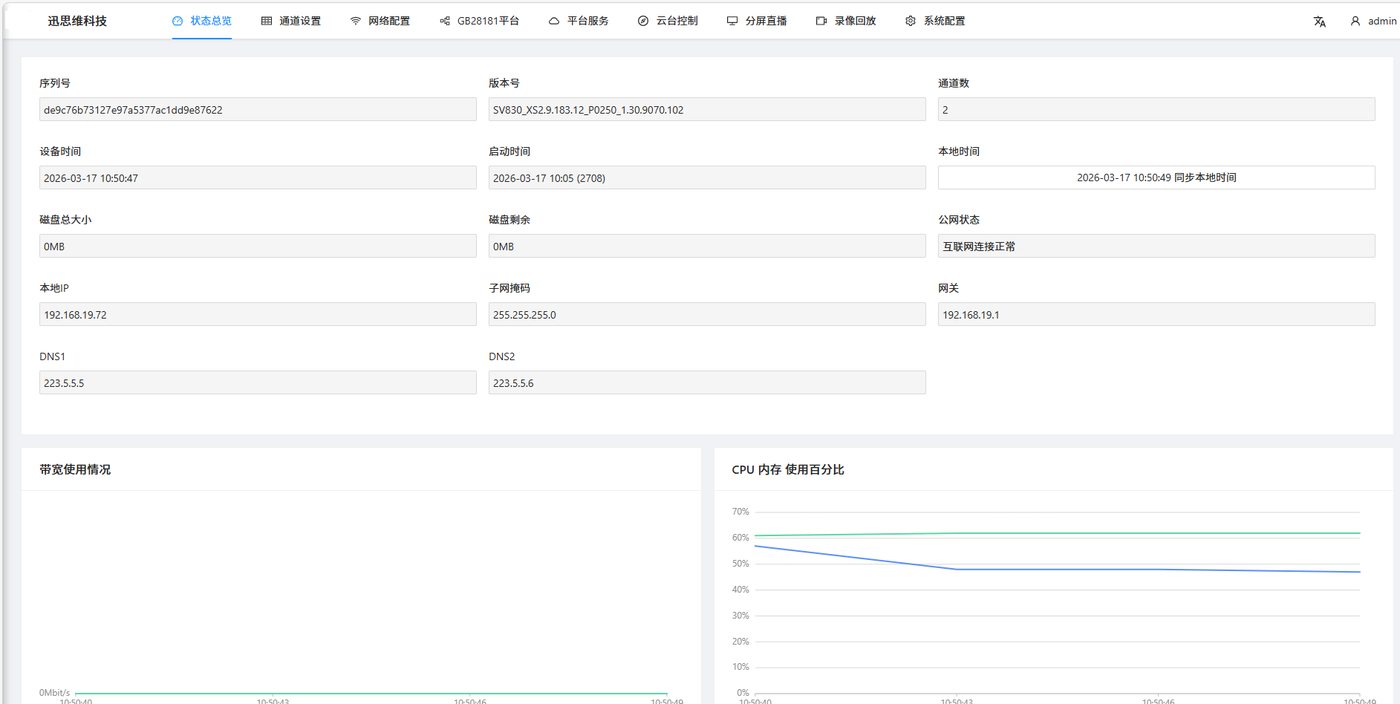
4. Home Page Status Overview
The device configuration interface is divided into upper and lower windows. The upper one is the function setting window, and the lower part is the function content window, as shown in Figure 2 below:
5. Adding the Device to the Feiyi Backend
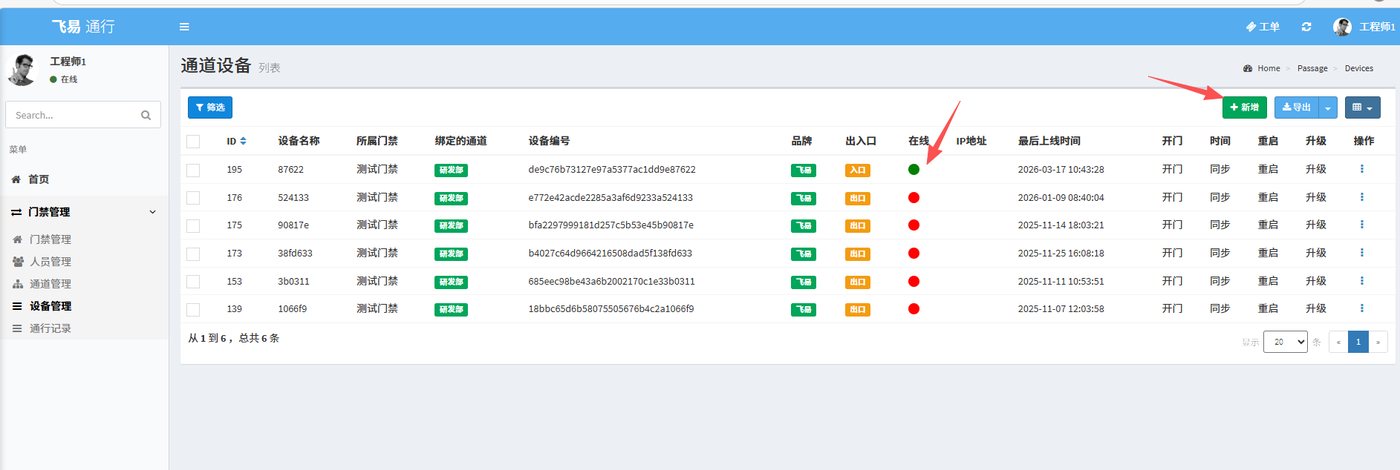
You can obtain the device serial number on the "Overview" page of the backend home page, then enter the Access Control Management and Device Management directories, and click "Add" to complete the device addition. When the device is connected to the network normally, the online status will be displayed.
6. Configuring the Device to Connect to WiFi
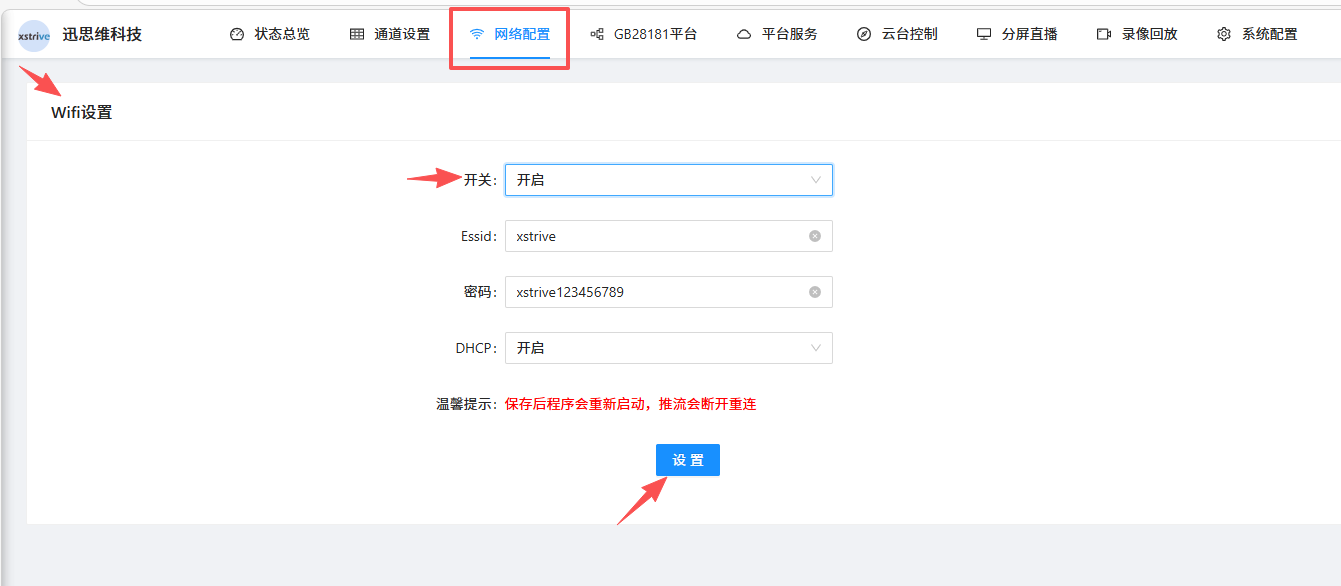
This device supports two networking methods: wired and WiFi. Wired networking is used by default. To switch to WiFi networking, follow the steps below:
This device only supports 2.4G band WiFi
7. NFC Card Swiping and Face Recognition
7.1 Add personnel information in the Feiyi backend and associate it with the corresponding device.
The operation steps are as follows:
First, you need to prepare a face photo, process it and then upload it to the backend. The specific processing steps are as follows:
Prepare the toolkit (contact after-sales personnel to obtain it)

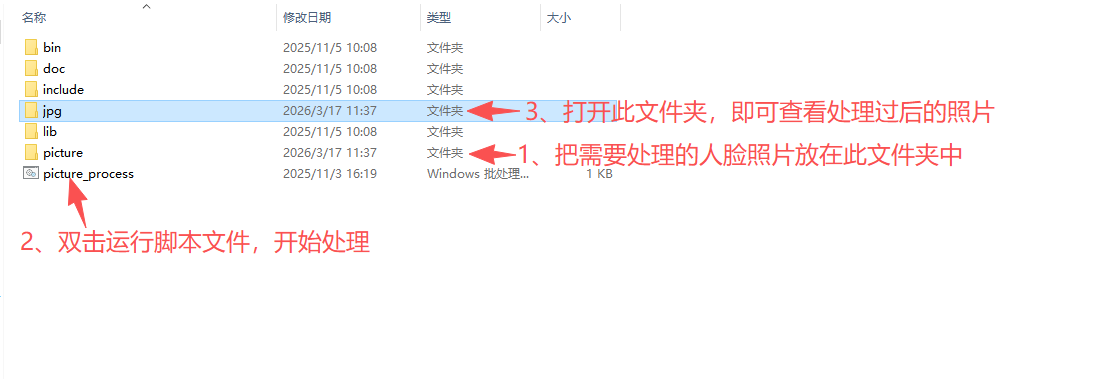
After the photo is processed, it can be uploaded in the backend
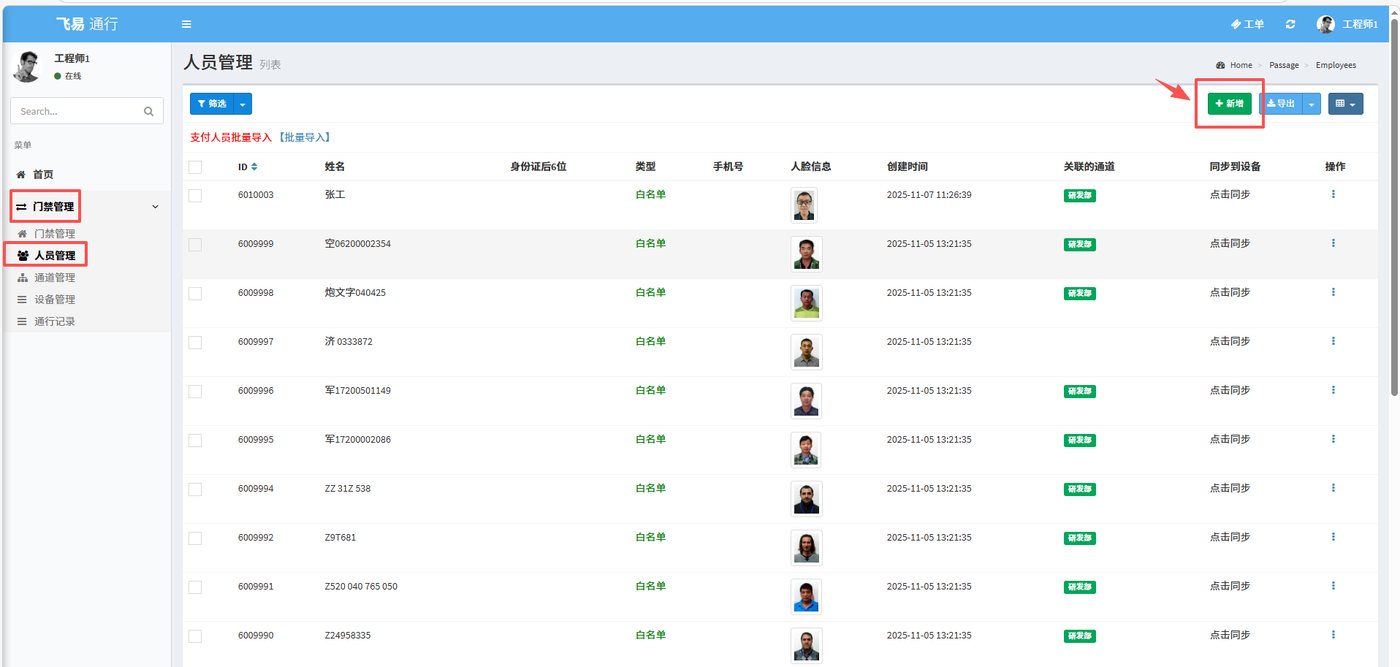
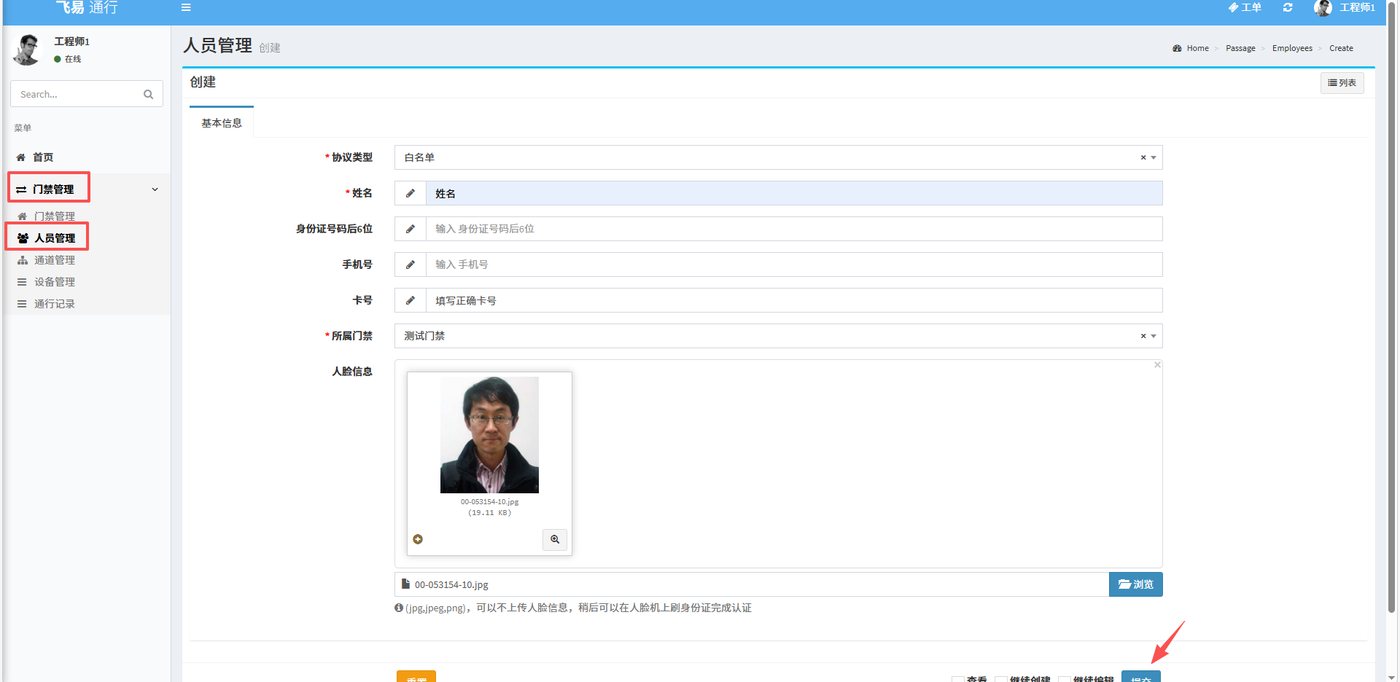
7.2 Associate the personnel with the corresponding device
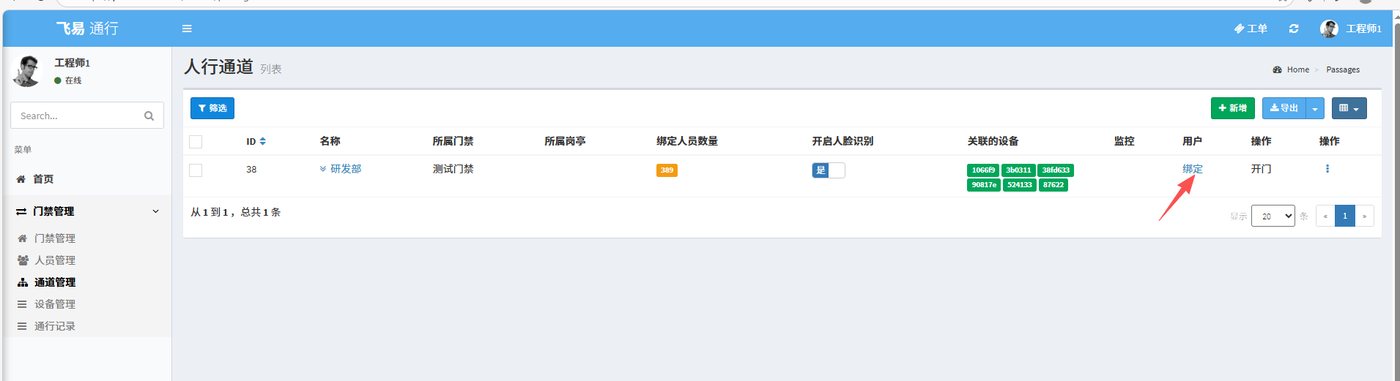
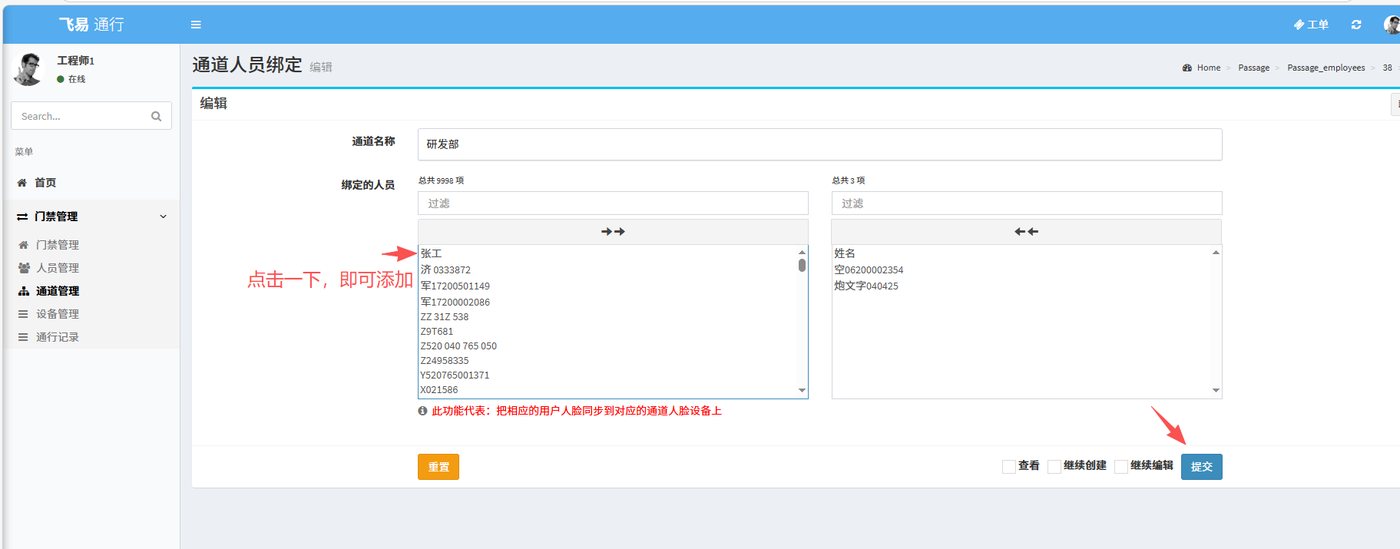
7.3 Verification
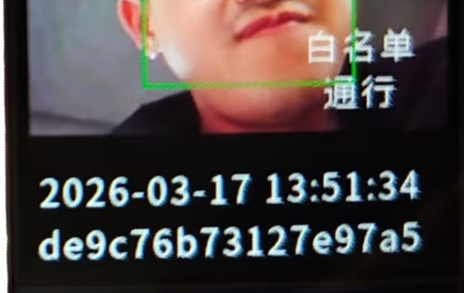
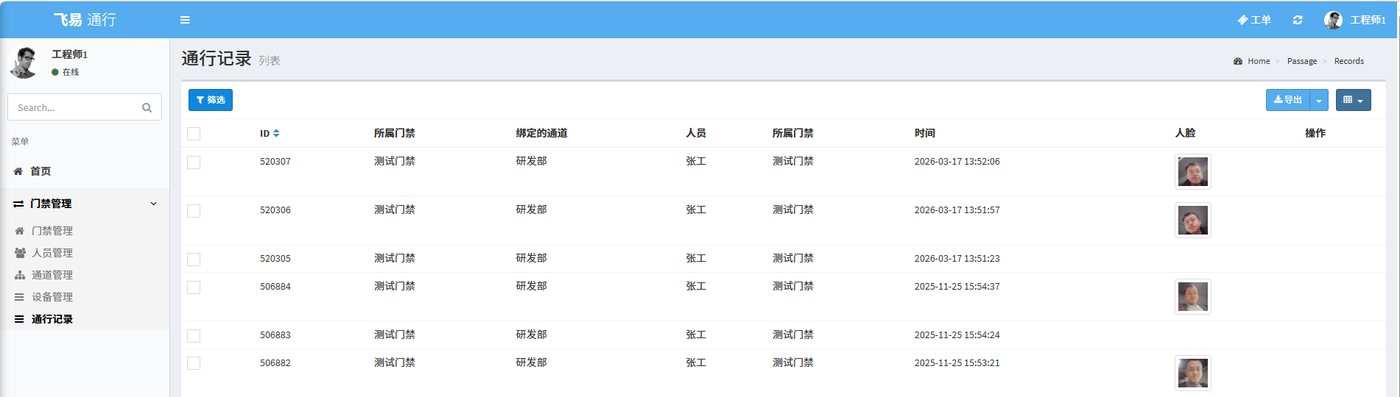
After the personnel complete face verification, it can be viewed in the backend