Face RecognitionCameraManual
Project: Device User Guide | page_id: 191
1. Device Introduction
Face recognition camera.
Product Capabilities
- Face detection
Detect the face position and lock the face coordinates - Face tracking
Accurately locate and track the facial region position - Face comparison
Compare the similarity of two faces - Face search
Find similar faces in the face database - Secondary Development
Friendly system, providing APIs for secondary development - Ordinary surveillance
Supports video surveillance functions of ordinary cameras, such as video monitoring, video distribution and real-time recording
Application Scenarios
- Can be used in smart communities, smart scenic areas, smart construction sites, smart campuses, smart hotels, smart offices and other scenarios.
Workflow Diagram
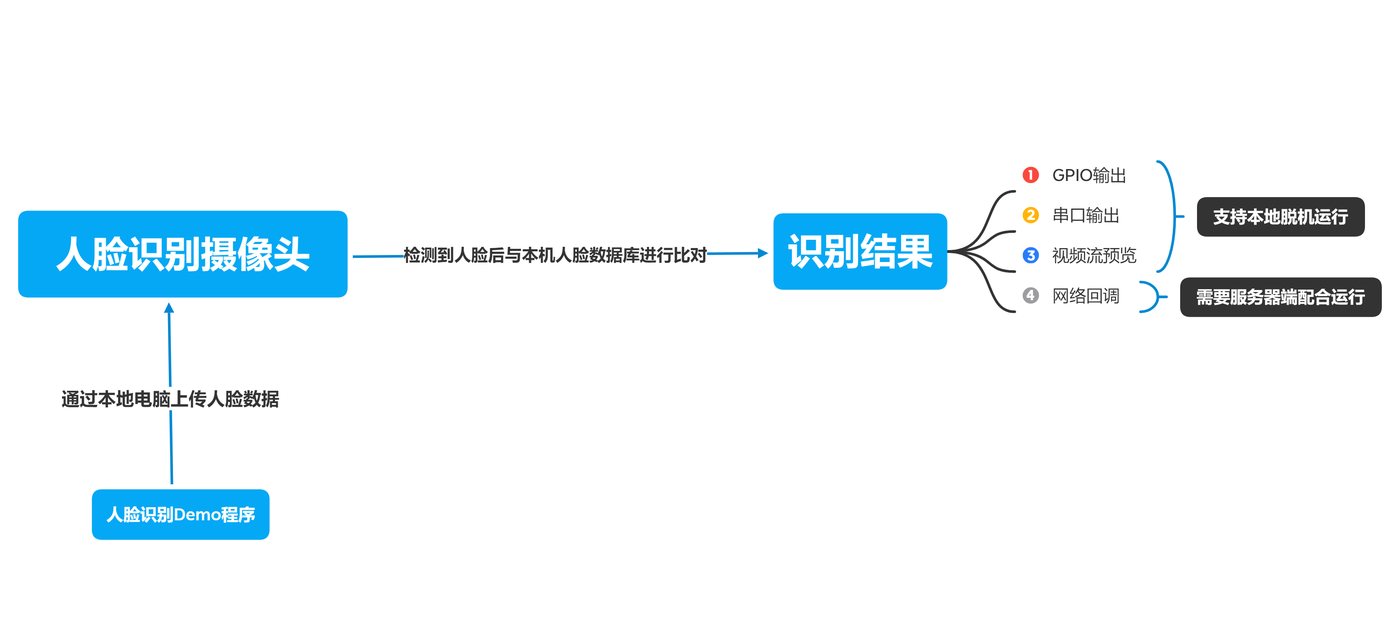
Server-side Flow Diagram
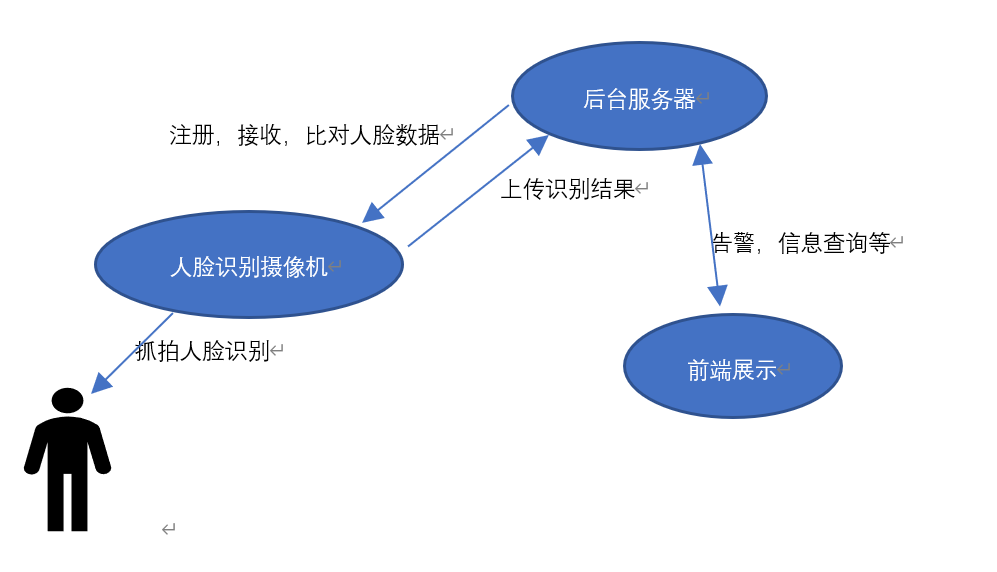
- We provide a face recognition demo (see below) to act as the [backend server] and [front-end display]. Integration customers can implement their own [backend server] and [front-end display] to achieve a user experience that fits their scenario.
- The [Face Recognition Camera] has a maximum upload interval of 10s.
2. First Use
-
Use the Device Search Assistant to search for and modify the device IP. The device default IP is 192.168.0.15.
Access the device management page at http://192.168.0.15/login.html for simple parameter configuration. -
Configure the recognition result upload address (see the demo below).
3. Face Recognition Demo Installation and Demonstration
-
Download and run the demo
Click to download Face Recognition Demo, extract it to the appropriate directory, read readme.txt and run the demo according to your system.
Check your system IP and access the demo sample page at http://ip:3003. -
Enter the demo page; the default page is face upload.
Device IP address: 【192.168.0.15】 Device port default: 【80】
Select a face and register it; the image information is then registered on the face recognition camera device. The face photo is saved in the image folder in the installation directory on this machine. -
Face list
Used to view the face image information registered on the device. -
Face comparison, batch comparison
Use local images to simulate face detection and output the comparison result. -
Event address
Callback base address: http://local-ip:3003, i.e. the address used to access the demo.
Default upload path: /face/event/add
Used to configure the address to which the face recognition camera sends its recognition results.
-
Event list
After configuring the local receiving address in the event address, you can view the recognition results in this event list. -
Finally, use VLC to view the camera's live picture at rtsp://192.168.0.15/live/chn=1 for preview playback.
Point the camera at a person's face to capture it. When a green recognition box appears, a face data sample has been captured successfully. Click into the event list again
and you should be able to see the recognition result just produced.
3. API Documentation
Click API Documentation to view.