HiSilicon3519AV100Board Guide
Project: Development Board Shipping Materials | page_id: 52
3519A Development Board Environment Setup and Operation Guide
Virtual machine download address
Link: https://pan.baidu.com/s/1ioAqYwwt596YZ2DFE6bMzg?pwd=xstr
Extraction code: xstr
The 3519A development board comes with two types of flash, emmc and spi. The flashing steps are as follows:
(The Baidu Netdisk link for the SDK is at the bottom of this document)
1. emmc version:
1.1 Flash U-Boot
Flashing commands:
Set addresses: setenv serverip 192.168.0.224;setenv ipaddr 192.168.0.222;sa;
Flash: mw.b 42000000 ff 100000;tftp 42000000 u-boot-hi3519av100.bin;mmc write 0 0x42000000 0 800
 Note: if the flash is empty, you must use Hitool to flash it. We normally ship the boards already flashed, so you can flash directly from the U-Boot interface unless the flash has been erased by accident.
 The U-Boot for emmc must be compiled by yourself; just follow the <Development Environment User Guide> document to compile it.
1.2 Flash the kernel
mw.b 42000000 ff 400000;tftp 42000000 uImage;mmc write 0 0x42000000 800 2000
1.3 Flash the file system
mw.b 42000000 ff 400000;tftp 42000000 uImage;mmc write 0 0x42000000 800 2000
1.4 Set U-Boot parameters and reboot
setenv bootargs 'mem=256M console=ttyAMA0,115200 root=/dev/mmcblk0p3 rootfstype=ext4 rw init=/linuxrc clk_ignore_unused blkdevparts=mmcblk0:1M(boot),4M(kernel),32M(rootfs),-(user)';setenv bootcmd 'mw.b 41000000 ff 0xC00000;mmc read 0 0x41000000 800 2000;bootm 0x41000000';sa;reset;
Note: the kernel for the emmc version must be compiled by yourself; just follow the <Development Environment User Guide> document. Select rootfs_hi3519av100_32M.ext4 as the file system. The emmc version must use the ext4 file system.
2. spi version:
2.1 Flash U-Boot
Flashing commands:
Set addresses: setenv serverip 192.168.0.224;setenv ipaddr 192.168.0.222;sa;
Flash: mw.b 42000000 ff 100000;tftp 42000000 u-boot-hi3519av100.bin;sf probe 0;sf erase 0 100000;sf write 42000000 0 100000
Note: if the flash is empty, you must use Hitool to flash it. We normally ship the boards already flashed, so you can flash directly from the U-Boot interface unless the flash has been erased by accident.
2.2 Flash the kernel
Flash: mw.b 42000000 ff 400000;tftp 42000000 uImage_hi3519av100_smp;sf probe 0;sf erase 100000 400000;sf write 42000000 100000 400000
2.3 Flash the file system
mw.b 42000000 ff 500000;tftp 42000000 rootfs_hi3519av100_64k.jffs2;sf probe 0;sf erase 500000 500000;sf write 42000000 500000 500000
2.4 Set U-Boot parameters and reboot
setenv bootargs 'mem=256M console=ttyAMA0,115200 clk_ignore_unused root=/dev/mtdblock2 rw rootfstype=jffs2 mtdparts=hi_sfc:1M(boot),4M(kernel),11M(rootfs)';setenv bootcmd 'sf probe 0;sf read 0x42000000 100000 400000; bootm 0x42000000';saveenv;reset;
Note: for U-Boot, use the U-Boot shipped with the HiSilicon SDK; developers can modify it themselves. For the spi version, the kernel can be the one shipped with HiSilicon or one you compiled yourself; just follow the <Development Environment User Guide> document. Select rootfs_hi3519av100_64k.jffs2 as the file system; developers can try flashing and using other file systems on their own.
Run the HiSilicon venc sample to capture camera video data
1 Image capture
1) Go to the /usr/ext/ko/ directory:
You need to copy the whole ko directory from smp\a53_linux\mpp in the SDK to a board directory, for example /usr/.
cd /usr/ko
2) Run the following command to load the driver:
./load3519av100 -i -sensor0 imx334 -sensor1 imx334 -sensor2 imx334 -sensor3 imx334 -sensor4 imx334
3) Mount with the virtual machine:
In the virtual machine, first compile venc. The directory is /Hi3519AV100_SDK_V2.0.2.0/smp/a53_linux/mpp/sample/venc/. Then run the following commands on the board:
ifconfig eth0 up;
ifconfig eth0 192.168.0.225;
mount -o nolock 192.168.0.92:/home/xstrive/hisi/ /mnt/
cd /mnt/Hi3519AV100_SDK_V2.0.2.0/smp/a53_linux/mpp/sample/venc/
4) Run the program:
./sample_venc 0
5) Then select 0, C in turn.
The camera video then starts being recorded, and two recording files are generated in the sample_venc statistics directory, which can be played back with VLC.
2 WiFi function
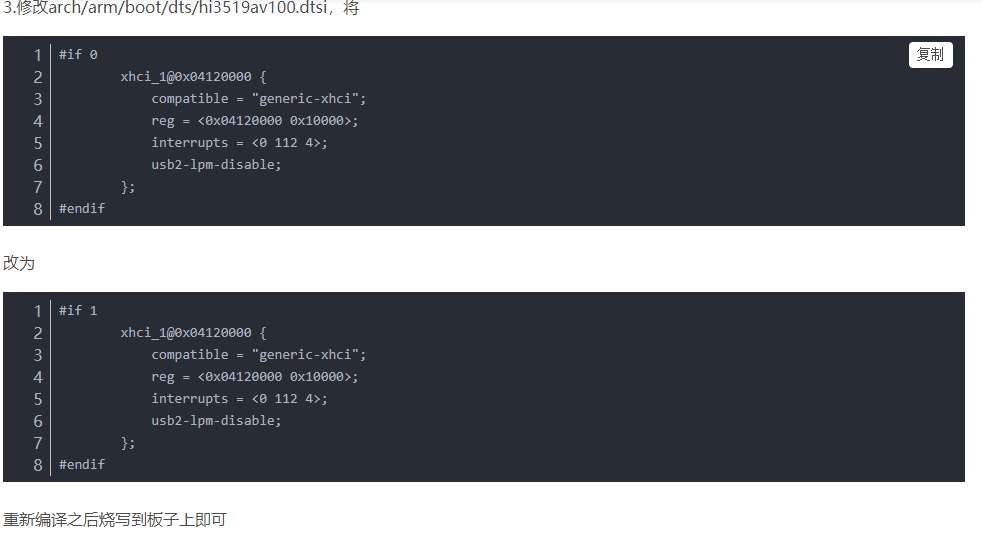
The 3519A requires recompiling the kernel and changing the parameters so that USB 2.0 is enabled, in order to recognize the 8188 WiFi module:
Kernel modifications are as follows:
1. Device Drivers > USB support > <> EHCI HCD (USB 2.0) support and <> OHCI HCD (USB 1.1) support
2. 
Then the kernel modifications related to the WiFi module are as follows:
1. Networking support -> wireless -> cfg80211 - wireless configuration API, tick cfg80211 wireless extensions compatibility.
2. Device Drivers -> Network device support -> wireless LAN ->
3. Networking support -> RF switch subsystem support.
4. Device Drivers ---> Network device support ---> Wireless LAN ---> IEEE 802.11 for Host AP (Prism2/2.5/3 and WEP/TKIP/CCMP)
Then compile the kernel, recompile the driver with the new kernel, then compile the wpa_supplicant and hostapd applications and copy them to the board to run.
3 Audio
Run the HiSilicon /sample/audio program, select the simultaneous input and output option, then plug a microphone and a speaker into the development board to play back the input sound.
4 SD card
The kernel supports SD card recognition by default. After plugging in an SD card, if it is a factory SD card you need to add a partition and then mount it.
Material download links
3519AV100 SDK materials
Link: https://pan.baidu.com/s/1T07nuDzEIo_zRKc7OfqiUA Extraction code: gpan
Note:
The development board has no IP at first; you need to set one: ifconfig eth0 192.168.0.227